How to Apply Press-On Nails: 7 Easy Steps to a Flawless Salon Look (2026)
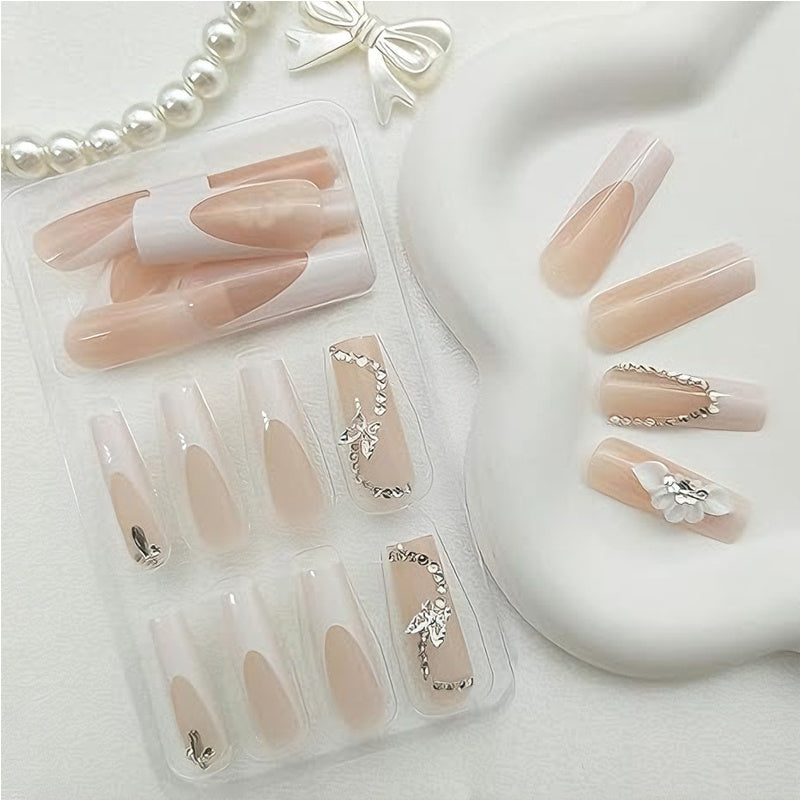
Learning how to apply press-on nails is the fastest way to get a beautiful, salon-worthy manicure without the salon price or the two-hour appointment. Today's press-ons look nothing like the stiff, shiny plastic tips of the past. They come in natural shapes, realistic lengths, and stunning designs, from soft minimalist styles to bold butterfly art, and a good set can be reused more than once.
The secret is not the nails themselves but the technique. Most people who say press-ons "don't last" skip one or two simple prep steps. In this guide, you'll learn exactly how to apply press-on nails so they stay put for days, look natural, and come off without damaging your real nails underneath.
Press-ons are also the perfect travel manicure. They pack flat, need no lamp or drying time, and you can change your look halfway through a trip. If you are already dreaming about your next getaway, MapYourDreams is a lovely place to start: browse their travel posters and map prints for inspiration, then pack a fresh set of press-ons so your nails are ready for every photo.

Why Press-On Nails Are a Smart Choice in 2026
Before we get into how to apply press-on nails step by step, it helps to know why so many beauty lovers are switching from acrylics and gels.
- Affordable: A full 24-piece set costs less than a single salon fill.
- Fast: Once you know how to apply press-on nails, a full set takes 15 to 20 minutes.
- Gentle: There is no heavy filing of your natural nail and no long acetone soak.
- Flexible: Wear a design for a weekend, a wedding, or a week, then switch styles.
Dermatologists agree that this kind of manicure can be easier on your nails. Cleveland Clinic lists press-on nails as a lower-trauma alternative to acrylics, because they add length without roughing up and thinning the nail plate.
What You Need Before You Apply Press-On Nails
Gather everything first so you are not hunting for a file with glue on your fingers. Here is your simple kit:
- A press-on nail set in your favorite design (see our Nail Art & Tools collection)
- Nail glue or adhesive tabs
- A nail file and buffer
- A cuticle stick (orange wood stick)
- Rubbing alcohol or nail dehydrator, plus a lint-free wipe
- Cuticle oil or a nourishing oil for aftercare
If you want sharper edges and faster shaping, a portable electric nail file kit makes resizing tips quick and even.
How to Apply Press-On Nails: 7 Easy Steps
Follow these seven steps in order. Each one makes a real difference to how long your manicure lasts.
Step 1: Remove Old Polish and Wash Your Hands
Every guide on how to apply press-on nails starts in the same place: completely bare nails. Remove any polish, then wash your hands with soap and water and dry them thoroughly. Any oil, lotion, or water left on the nail will stop the glue from bonding.
Step 2: Gently Push Back Your Cuticles
Use the cuticle stick to gently push back the cuticle so the press-on sits flat on the nail plate. Do not cut your cuticles. The American Academy of Dermatology advises leaving the cuticle in place, since it protects the nail from infection.
Step 3: Shape and Lightly Buff Your Natural Nails
Trim your nails short and file them to roughly match the shape of your press-ons. Then lightly buff the shiny surface of each nail, just enough to remove the shine. A heavy buff is not needed and thins the nail, so keep it gentle.
Step 4: Size Every Nail Before You Glue
If there is one rule in how to apply press-on nails that beginners skip, it is this one. Lay out all the tips and match one to each finger before you open the glue. The press-on should cover your nail from side wall to side wall without touching the skin. If you fall between two sizes, choose the slightly larger one and file the sides down for a perfect fit. Most of our sets, like the Minimalist Short Circle Press-On Nails, include 24 pieces in several sizes, so you will always find a good match.
Step 5: Dehydrate the Nail Surface
Swipe each nail with rubbing alcohol on a lint-free wipe. This removes the last traces of oil and dust and is the single biggest secret to long wear. Let it dry for a few seconds.
Step 6: Apply Glue and Press at an Angle
Now for the main event in how to apply press-on nails. Add a thin layer of glue to your natural nail and a small drop to the inside of the press-on. Place the tip at the cuticle line at a 45-degree angle, then rock it down toward the free edge. Angling it this way pushes out air bubbles so the bond is strong and smooth.
Step 7: Hold Firmly for 30 Seconds
Press down on the center and both sides of the nail for about 30 seconds. Repeat on every finger, then avoid water for at least an hour so the glue can fully cure.

How to Apply Press-On Nails with Glue vs. Adhesive Tabs
You get to choose your adhesive. Each one suits a different plan:
- Nail glue: The strongest hold. Best when you want your set to last one to two weeks.
- Adhesive tabs: A softer hold that lasts one to three days. Ideal for a party, photoshoot, or weekend, and much easier to remove.
Tabs are also a kind option if your natural nails are thin or recovering, since they come off with no soaking.
5 Proven Tips to Make Press-On Nails Last Longer
Knowing how to apply press-on nails is half the job. These habits keep them looking fresh:
- Wear gloves for chores. Hot water and cleaning products weaken glue fast.
- Do not use your nails as tools. Use your fingertips, not the nail edge, to open cans or peel labels.
- Re-glue lifting edges right away. A tiny drop under a lifted corner stops water from getting in.
- Keep length practical. Shorter styles, like our Simple Flat Short Square Tips, catch less and last longer.
- Moisturize your cuticles. A drop of oil each night keeps the skin around the nail soft and healthy.
How to Remove Press-On Nails Safely
Removal matters just as much as learning how to apply press-on nails. Never pull or pry a press-on nail off. Doing so can peel away layers of your natural nail. Instead, soak your fingertips in warm, soapy water with a little oil for 10 to 15 minutes. Then gently work a cuticle stick under the side of the nail and lift slowly. If you used strong glue and it still will not move, soak only your fingertips in acetone for a few minutes.
After removal, buff away any leftover glue, wash, and moisturize. If you plan to reuse the set, clean the glue off the inside of each tip and store them in their box.
Press-On Nail Safety: Keep Your Natural Nails Healthy
Part of knowing how to apply press-on nails is knowing how to protect the nails underneath. Press-ons are one of the gentler manicure options, but a few precautions matter. A Cleveland Clinic dermatologist notes that the main risks are infection, allergic reactions to the glue, and damage from rough application or removal. She recommends keeping nails short and saving press-ons for special occasions rather than wearing them nonstop.
Give your nails a break of a few days between sets. If you notice redness, swelling, or discoloration, remove the nails and see a dermatologist. To rebuild strength between manicures, a treatment like our Whitenail Repair Liquid can support healthy-looking growth.

Best Press-On Nail Designs to Try This Season
Now that you know how to apply press-on nails like a pro, the fun part is choosing a look. A few customer favorites:
- White Flower & Butterfly Press-On Nails – soft, romantic, and perfect for weddings.
- Wine Red French Tip Heart Nails – a modern twist on the classic French.
- Black & Pink Butterfly Press-On Nails – bold and playful for nights out.
- Halloween Press-On Nails – a fun seasonal set in almond and ballerina shapes.
Love doing your nails at home? Read our guide on how to do gel nails at home, or explore the 10 best nail art tools for even more creative manicures.
Frequently Asked Questions
How long do press-on nails last?
With glue and good prep, press-on nails usually last one to two weeks. With adhesive tabs, expect one to three days.
Can I reuse press-on nails?
Yes. If you remove them gently and clean off the old glue, many sets can be worn two or three times.
How to apply press-on nails without glue?
Use double-sided adhesive tabs. Follow the same prep steps, peel the tab onto your natural nail, remove the top film, and press the tip on firmly for 30 seconds.
Is it hard to learn how to apply press-on nails?
Not at all. Most people get a neat result on their first try, and by the second or third set the whole process feels quick and easy.
Do press-on nails damage your natural nails?
Not when you follow the right steps. Light buffing, no cuticle cutting, and gentle removal keep your natural nails healthy.
Conclusion: Your Perfect Manicure Starts Now
Now you know exactly how to apply press-on nails for a flawless, long-lasting finish: prep, size, dehydrate, glue at an angle, and hold. Bookmark this guide on how to apply press-on nails and come back to it whenever you start a new set. With a little practice, you will have a gorgeous manicure in under 20 minutes whenever you want one. Ready to try it? Shop our full range of press-on nails and tools in the Nail Art & Tools collection and find your next favorite set today.